
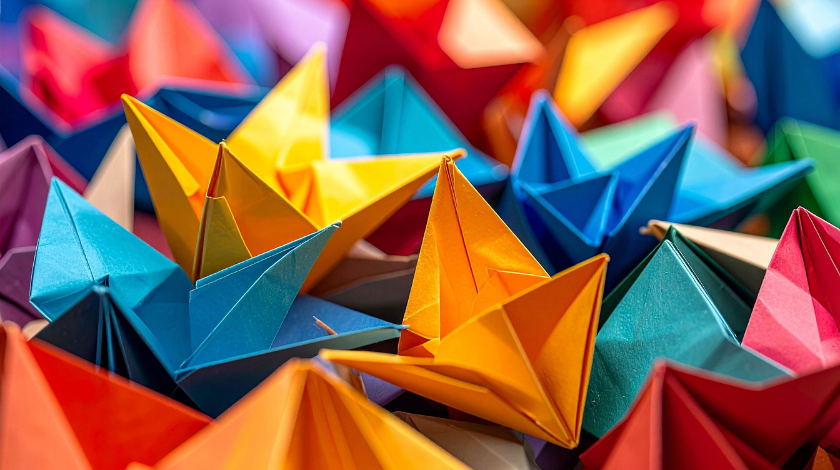
When I first discovered origami about five years ago, I was sitting in my apartment feeling stressed about work deadlines. A friend handed me a single sheet of paper and said, “Just try folding this into a crane.” I was skeptical at first, but something magical happened when I started creasing and folding that paper. Within fifteen minutes, I held a beautiful paper crane in my hands, and I felt genuinely calm for the first time in weeks. That simple moment changed my perspective on what a piece of paper could become, and it started my journey into the wonderful world of origami animals.
Understanding Origami and Its Rich History
Origami, which comes from the Japanese words “ori” meaning folding and “kami” meaning paper, is the art of transforming a flat sheet of paper into an intricate three dimensional sculpture using only folds and creases. No glue, no scissors, no paint. Just paper and your hands. This might sound simple, but the possibilities are truly endless.
The history of origami is fascinating and goes back much further than most people realize. While many associate origami with Japan, paper folding has ancient roots in China and the Middle East as well. However, Japan truly elevated origami to an art form. During the Edo period in Japan, origami became popular among the wealthy and educated classes. The most iconic origami creation, the paper crane, carries deep cultural significance in Japanese tradition. According to legend, if you fold a thousand paper cranes, you’ll be granted a wish. This legend, known as Senbazuru, became particularly meaningful after World War II and continues to inspire people worldwide.
What I find incredible is that origami wasn’t always accessible to everyone in ancient times because paper was extremely expensive. It was considered a luxury material reserved for special occasions and ceremonies. Can you imagine? Now we have access to countless types of paper, and origami has become a hobby for people of all ages and backgrounds.
Gathering Your Materials and Tools
Here’s the beautiful part about getting started with origami animals: you probably already have everything you need at home. The most essential item is paper. When I started, I used regular printer paper, and it worked fine for learning basic folds. However, as I progressed, I discovered that different paper types dramatically affect your folding experience.
Traditional origami paper, called washi in Japan, comes in beautiful colors and patterns. It’s thinner than regular printer paper, which makes it easier to fold multiple times without creating thick, bulky creases. I recommend starting with origami paper from a craft store because it typically costs only a few dollars for a pack of hundreds of sheets. The colors are vibrant, and it’s specifically designed for this purpose.
When you’re just beginning, I suggest avoiding glossy or plastic coated paper because it won’t hold creases well. Newspaper can work in a pinch, but it tears easily. Tissue paper is too delicate. Regular paper works, though your folds might not look as crisp.
Beyond paper, you might want to keep a few other items nearby. A bone folder is a small tool with a smooth edge that helps you create sharp, clean creases. It’s not essential, but I find it incredibly helpful, especially for precise folds. You can even use the edge of a ruler or a credit card as a makeshift bone folder.
Some people like to use a paper cutter to ensure perfectly square sheets, but this is really optional. Keep your fingernails in decent shape because you’ll use them constantly for creasing. I keep a ruler nearby for checking proportions and ensuring symmetry, though you’ll develop a feel for it over time.
Learning the Fundamental Folding Techniques
Every origami animal, regardless of complexity, is built from basic folds. When I first started learning, I was overwhelmed by thinking I needed to memorize complicated techniques. Then my mentor told me something that changed everything: every complex origami project is just a series of simple folds done in a specific order.
The mountain fold is one of the two most fundamental techniques. Imagine the fold creates a mountain shape with the peak pointing toward you. You bend the paper so that the two sides go away from you, creating that mountain ridge appearance.
The valley fold is the opposite. Instead of creating a peak, you fold the paper so that it creates a valley shape, with the crease pointing toward you and the sides coming toward you. These two folds are literally the foundation of every single origami project I’ve ever done.
Once you’re comfortable with these basic folds, you can start learning variations like the petal fold, the inside reverse fold, and the outside reverse fold. The inside reverse fold involves opening a pocket created by previous folds and tucking material inside. The outside reverse fold wraps material around the outside of existing folds. These sounds complicated when explained, but once you do them a few times, they become second nature.
I recommend practicing these basic folds for at least a few sessions before attempting your first animal. Get comfortable with how paper responds to your hands. Learn how to make crisp, clean creases. Understand how folds affect the overall shape. This foundation makes everything else dramatically easier.
Creating Your First Origami Animals
The origami crane holds special meaning for me because it was my first project, and it remains my favorite. To fold a crane, you start with a square sheet of paper and make a series of valley and mountain folds. You’ll create a diamond shape, then a smaller diamond, then fold down the top corners. Then comes the magic moment where you fold the whole thing in half and start manipulating the layers to create the neck, head, and tail.
I still remember the first time my hands correctly positioned the paper into that final crane shape. The symmetry, the elegance, the way it looked like it might actually fly off my hands. That feeling of accomplishment is something I try to recreate with every new animal I learn.
The origami butterfly is another fantastic beginner project that produces stunningly beautiful results quickly. You start with a rectangle, fold it in specific ways to create wings and a body, and within a few minutes, you have a recognizable butterfly. What’s wonderful about the butterfly is that you can vary the folds slightly and create butterflies that look completely different from each other.
The origami fish is perhaps the easiest project, which makes it perfect for absolute beginners or young children. It requires maybe five to seven folds, and children typically feel incredibly proud when they produce a recognizable fish. I’ve used this project countless times when teaching kids because the success rate is nearly 100 percent, and it builds confidence for tackling more complex projects.
The origami frog is another beginner favorite that has the added bonus of being interactive. Once you’ve folded the frog, you can actually make it jump by pushing its back legs down. Kids go absolutely wild for this. I’ve made hundreds of paper frogs at this point, and they never get old.
Moving Into Intermediate Territory
Once you’ve mastered basic animals and feel confident with your folding skills, intermediate projects become much more approachable. The origami swan is a step up in complexity from the crane but still very manageable. It requires more careful attention to proportions and creating curved shapes with your folds.
The origami penguin is one of my personal favorites because it’s surprisingly quick to complete, yet it looks sophisticated and adorable. There’s something about the way the folds create that little body and waddle walk posture that makes me smile every single time.
The origami owl combines several techniques you’ve already learned but applies them in new ways to create a completely different animal. The key to owls is getting the head shape right and creating those characteristic feather details.
The origami turtle teaches you how to create limbs and a shell that looks realistic. This is where you start understanding how to build different body parts separately and combine them into a cohesive animal.
Tackling Advanced Origami Projects
Advanced origami is where things get genuinely complex and beautiful. I’ve been doing origami for five years, and I still find advanced projects challenging and rewarding. These might take several hours to complete and require intense concentration.
Complex animal designs at this level might include realistic dragons with intricate scales, detailed birds with feather patterns, or anatomically correct quadrupeds. Some advanced projects use a single sheet of paper and involve hundreds of folds. I’ve seen origami artists create animals so realistic you’d think they were carved from jade.
Modular origami is a specialized technique where you fold multiple identical pieces and connect them to create larger, more complex structures. I tried creating a modular origami ball made from 30 individual folded units, and it took me three days. The final result was so satisfying that it now sits on my shelf as a conversation starter.
The Therapeutic Magic of Paper Folding
I want to talk about something that genuinely changed my life. The moment I discovered that origami calmed my anxiety, everything shifted. There’s something about the repetitive, mindful nature of folding paper that quiets mental chatter.
When you’re folding origami, you can’t think about your problems, your worries, or your to-do list. You can only think about where the next crease goes. Your hands are engaged, your mind is focused, and before you know it, thirty minutes have passed, and you feel noticeably calmer.
Research supports this anecdotal experience. Studies have shown that repetitive, focused activities like origami can reduce cortisol levels, lower blood pressure, and decrease anxiety. It’s similar to meditation, but instead of sitting quietly, you’re actively creating something beautiful. Some therapists actually recommend origami to patients dealing with stress, anxiety, and even ADHD.
What strikes me most is that origami is accessible therapy. It costs almost nothing. You don’t need special equipment or training. You can do it anywhere. I’ve folded paper cranes in hospital waiting rooms, on airplanes, in coffee shops, and during stressful phone calls. It’s always there when I need it.
Teaching Origami to Children
If you have kids or work with them, origami is an incredibly valuable tool. It teaches patience, following directions, fine motor skills, spatial reasoning, and creativity all at once.
I’ve taught origami to kids ranging from three years old to teenagers, and I’ve learned what works and what doesn’t. Young children, ages three to five, do best with projects that take just a few minutes and have forgiving folds. The paper fish and jumping frog work wonderfully.
For school-aged children, more complex projects become engaging. They can handle longer instruction sequences and understand the relationship between folds and the final shape. A friend of mine who teaches third grade uses origami animals as a reward system, and her students are incredibly motivated to behave well so they can earn an origami project.
Teenagers often enjoy the challenge of complex projects and appreciate the artistic aspect. They can understand advanced techniques and work through frustration when a fold doesn’t go perfectly the first time.
The key is matching the project to the child’s skill level and patience threshold. Nothing kills interest faster than a project that’s too difficult or too simplistic.
Displaying and Preserving Your Creations
After you’ve folded all these beautiful animals, you’ll want to display and preserve them. I have a shadow box on my wall featuring my first paper crane along with cranes I’ve folded since then, showing my progress over five years.
Origami is surprisingly durable if you take care of it. Keep your creations away from direct sunlight, which fades colors over time. Humidity can be problematic because paper absorbs moisture, which can soften creases. In very dry conditions, paper can become brittle. Aim for moderate humidity levels.
Display boxes, shadow frames, and glass cases protect your work while allowing it to be visible. Some people use clear plastic containers to preserve their best pieces. I’ve even seen people create entire rooms dedicated to origami art collections.
If you want to gift origami animals, presentation matters. A beautifully folded crane in a simple envelope with a handwritten note is far more meaningful than most people realize.
Common Mistakes and How to Avoid Them
When I started, I made plenty of mistakes, and I still do occasionally. Learning from these errors has made me significantly better.
The biggest mistake beginners make is not creasing firmly enough. Soft, unclear creases lead to sloppy looking final products. Take your time with each crease. Run your fingernail or bone folder along the entire fold line multiple times.
Another common error is not starting with square paper when the instructions call for it. If your starting paper isn’t square or rectangle, your proportions will be off, and the animal won’t look right.
People often rush through the early folds because they seem simple and want to get to the “good parts.” But origami is a process where earlier folds affect everything that comes later. If your foundation is sloppy, the entire project suffers.
Not following the diagram carefully is another frequent mistake. Every single fold in origami serves a purpose. If you skip a fold you think is unnecessary or combine steps you think could be combined, you’ll end up with something that doesn’t quite work.
Conclusion
My journey into origami has been one of the most rewarding hobbies I’ve pursued. It’s taught me patience, mindfulness, precision, and the satisfaction of creating beauty from something simple. It’s relieved my anxiety, impressed my friends, delighted children, and given me countless hours of meaningful engagement.
Whether you’re drawn to origami for the therapeutic benefits, the artistic expression, or simply because you want to learn something new, starting is incredibly easy. Buy a pack of origami paper for a few dollars, watch a tutorial online, and fold your first animal today. I promise you, the sense of accomplishment when you complete your first project is worth it.
Origami animals are more than just folded paper. They’re meditation, art, challenge, and joy all rolled into one. I hope you’ll join me in exploring this beautiful hobby.
FAQ
Q: Do I need special paper to start origami?
A: No, regular printer paper works fine for learning. However, origami paper from craft stores is ideal because it’s thinner, holds creases better, and comes in beautiful colors. It’s inexpensive and worth the investment.
Q: How long does it take to fold an origami animal?
A: Simple animals like a fish or butterfly take 5 to 15 minutes. Intermediate animals like cranes take 15 to 30 minutes. Complex animals can take several hours or even days. It depends on the project and your experience level.
Q: Can children do origami?
A: Absolutely. Children as young as four or five can start with very simple projects. Origami helps develop fine motor skills, patience, and spatial reasoning. Always match the project complexity to the child’s age and abilities.
Q: Is origami difficult?
A: The beauty of origami is that it’s scalable. You can start with very simple projects that anyone can do and progress to extremely complex ones over time. Most people can create their first origami animal successfully within a day or two of learning.
Q: Where can I find instructions for origami animals?
A: YouTube has countless free tutorials from basic to advanced levels. Books on origami are available at libraries and bookstores. Origami websites offer free diagrams and instructions. I recommend starting with videos because seeing the folding motion is helpful.
Q: How do I store origami creations?
A: Keep them in a cool, dry place away from direct sunlight. Use shadow boxes, display cases, or clear containers. Avoid humidity and excessive dryness. Proper storage can keep your origami beautiful for years.
Q: What’s the difference between origami and paper crafts?
A: Origami uses only folding to create shapes, with no cutting, gluing, or additional materials. Other paper crafts might involve scissors, glue, paint, and other supplies. Traditional origami relies solely on the paper and the folder’s hands.